
You are viewing the article Instructions on how to install Chrome OS for laptops in the most detailed and accurate way at Thptlaihoa.edu.vn you can quickly access the necessary information in the table of contents of the article below.
Chrome OS is a powerful and user-friendly operating system developed by Google, specifically designed for Chromebooks and laptops. If you’re looking to experience the seamless and secure computing environment offered by Chrome OS on your laptop, this guide is for you. In this detailed and accurate set of instructions, we will walk you through the process of installing Chrome OS on your laptop step by step. From the required system specifications to creating a bootable USB drive, and finally, installing Chrome OS, we’ll cover everything you need to know to successfully install this lightweight and efficient operating system. So, let’s get started and transform your laptop into a Chromebook in no time.
Besides Windows and MacOS, Chrome OS is also loved by many laptop users thanks to its unique features. Let’s learn how to install Chrome OS for laptops with Thptlaihoa.edu.vn through the following article!
Chrome OS User Audience
Chrome OS users are often lovers of software such as: Google Chrome, Chrome Apps, … because the operations on Chrome OS are performed on the website platform, which is Google Chrome.

Install via USB Boot
Chrome OS is an operating system that installs via USB Boot in the background, so you need to create a Bootable USB drive to contain Chromium OS inside. To do this, you need to prepare the following equipment and software:
- The computer has a USB port.
- USB at least 4GB or more.
- Download software:
Extract: 7-Zip for Windows (free); Keka for macOS; P7zip for Linux.
IMG File Burner: Etcher for macOS, Windows or Linux.
Note: The USB drive will be completely erased during the installation process. If you have any valuable data on the drive, save it elsewhere.
Then follow these steps to install Chrome OS with USB Boot:
Step 1: Prepare an empty USB to plug into the computer -> Go to This PC -> Right click on the USB -> Select Format .

Step 2: Select FAT at File system -> Click Start and wait for the machine to format.

Step 3: Access THIS LINK -> Click DOWNLOAD USB MAKER .

Step 4: Use Chrome browser and go HERE to download the Chromebook Recovery Utility -> Click Add to Chrome (Add to Chrome) to add the application -> Then run the application.

Step 5: Click Get Started to start creating USB.

Next, click on the gear icon -> Select Use local image .

Step 6: Select the path to the CloudReady file downloaded in Step 2.
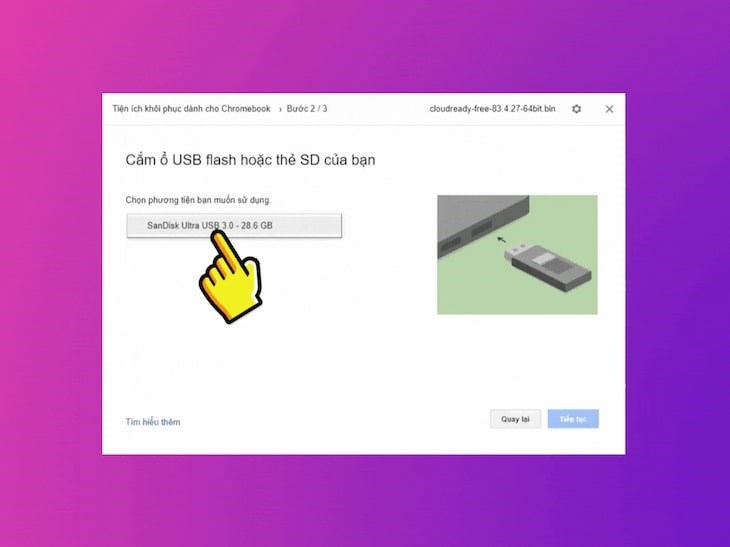
Step 7: Select the USB name you formatted in Step 1 -> Click Continue .

The last step , you click Create now and wait for the installation process to take place.

Install via Neverware CloudReady virtual machine
Step 1: Download the CloudReady software (search on google for the keyword “CloudReady”) to download USB Maker.

Step 2: At the home page interface, click DOWNLOAD USB MAKER .

Step 3: Then, go to the Chrome browser and find the Add-ons section.

Step 4: Next, enter Recovery Utility for Chromebooks in the search bar.
-730x548.jpeg "Type Recovery Utility for Chromebooks in the search bar")
Step 5: After the search results are returned, click the Recovery Extension for Chrome and click Add to Chrome.
-730x548.jpeg "Continue clicking Add to Chrome")
Step 6: Once added, you will be directed to the Chrome App website. Here, select the Recovery application.
-730x548.jpeg "Here you choose to go to the Recovery application")
Step 7: Next, click on the Settings gear icon and select Use local image . Then press the Start button.

Step 8: In the next step, select the downloaded CloudReady file on your device.

Step 9: The application will continue to ask you to confirm the USB you want to store and press Continue .
Step 10: Then click Create now and wait for the USB setup process.

Click Create now and wait for the USB setup process
Step 11: After successfully created, the machine will ask if you want Format Disk or not.

Step 12: Finally, restart your device and proceed to Boost USB to use Chrome OS.
-730x433.jpg "Restart the machine and proceed to Boot USB to use Chrome OS")
Things to do after installing Chrome OS
Language settings
Because the default language is English, you need to go to the Select your language section to set the language that is right for you.

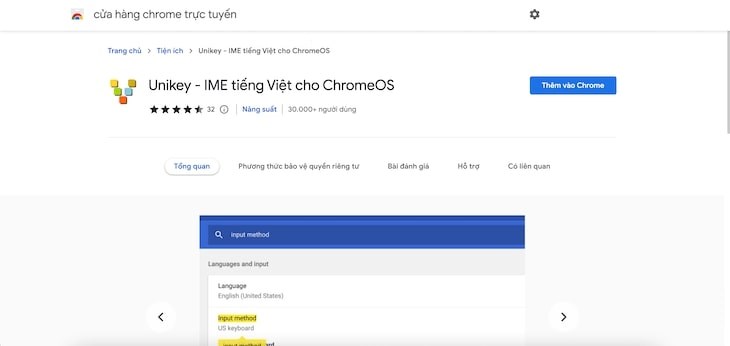
Reinstall the Vietnamese typing toolkit
By default, Chrome OS supports Vietnamese percussion, but there is still an error when typing the letter w but the text is not displayed. So you need to install Unikey percussion intothe extension on Chrome.
Install a VPN to use the Youtube Music App
YouTube Music application helps you listen to music according to your personal needs on Youtube but unfortunately has not been released in Vietnam yet. So if you want to use it, you need to install a VPN to change your laptop IP from Vietnam to another country.
You can type the keyword ” VPN settings ” on Google to find out more information.
-min-730x353-730x353.jpg)
Turn on the touchpad on and off feature
The touchpad is a convenient point when using a laptop, but sometimes it will also make the pointer run around when working. So turning on and off the touchpad feature will make it easier for you to control during work. You need to do the following steps:
- Step 1: Open Chrome browser (Ctrl + N) and type: chrome://flags/#ash-debug-shortcuts
- Step 2: Select Enabled as shown below:
-730x353-730x353.jpg)
- Step 3: You press the key combination Window + Shift + P to turn off or open the touchpad on Chrome OS.
Install download management software
A good downloader software not only provides faster download speed, but also allows users to pause and resume the download process at any time. The recommended download software for you is IDM , JDownloader , FDM , …

Above is how to install Chrome OS on a laptop. If you have any questions, please leave a comment below so that Thptlaihoa.edu.vn can promptly assist you!
In conclusion, installing Chrome OS on a laptop requires a series of steps following a detailed and accurate approach. By beginning with the essential requirement of downloading the appropriate Chrome OS image and creating a bootable USB drive, users can successfully install the operating system. Carefully initiating the installation process by enabling developer mode, accessing the installation menu, and following the guided instructions ensures a smoother installation. It is crucial to closely adhere to the provided steps to guarantee accuracy and detailed execution.
Throughout the installation, users should be cautious about potential risks and prepare their laptops accordingly by backing up data and creating restore points. Timely research and staying updated with the latest developments in the Chrome OS community are imperative to ensure compatibility and avoid any unforeseen complications during the installation process.
Following the accurate and detailed instructions outlined in this guide, users can effectively install Chrome OS on their laptops and explore the features and advantages offered by this lightweight and secure operating system. With its simplicity and seamless integration with Google services, Chrome OS presents an appealing alternative for users seeking a streamlined and efficient computing experience.
Thank you for reading this post Instructions on how to install Chrome OS for laptops in the most detailed and accurate way at Thptlaihoa.edu.vn You can comment, see more related articles below and hope to help you with interesting information.
Related Search:
1. Step-by-step guide to installing Chrome OS on a laptop
2. Detailed tutorial for installing Chrome OS for laptops with all the necessary requirements
3. Accurate installation instructions for Chrome OS on laptops using official recovery media
4. Complete guide to installing Chrome OS on any laptop, including recommended hardware specifications
5. Step-by-step tutorial on how to install Chrome OS on a laptop without wiping your existing data
6. Easy-to-follow instructions for installing Chrome OS on laptops with dual boot capability
7. Detailed guide for installing Chrome OS on laptops with a USB flash drive as the installation media
8. Accurate instructions for installing Chrome OS on laptops with a CD or DVD drive
9. Step-by-step tutorial for installing Chrome OS on laptops using Linux-based Crouton software
10. Comprehensive guide to installing Chrome OS on laptops through Android emulators


