
You are viewing the article How to make delicious and simple crispy coconut tart at home at Thptlaihoa.edu.vn you can quickly access the necessary information in the table of contents of the article below.
Coconut tarts are a delightful treat that is loved by many. The combination of crispy crust, sweet coconut filling, and a hint of tropical flavor makes them an irresistible choice for dessert. While they may seem intimidating to make, they are actually quite simple and can be prepared right at home. In this guide, we will walk you through the step-by-step process of creating delicious and crispy coconut tarts that will impress your friends and family. So grab your apron and get ready to indulge in this mouthwatering dessert!
Crispy coconut tarts add a delicious spongy texture, making it so simple to prepare according to Thptlaihoa.edu.vn’s recipe. Try your hand at making this new dessert today, the whole family will be amazed.

Prepare
30 MinutesProcessing
60 MinutesFor
3-4 people
Ingredients for making coconut tarts
- 105g unsalted butter
- 90g sugar
- 2 chicken eggs
- 140g flour
- 60ml fresh milk without sugar
- 100g desiccated coconut
- Baking powder, vanilla essence
- Baking tools: Oven, bowl, stencils, whisk, small tart mold, food foil…
Good tip:
To choose to buy fresh and clean chicken eggs, you should choose the ones that have a slightly rough, rough shell, the shell does not appear black spots or have a pale color,… Do not buy eggs with a pale, damaged shell. Cracked and black spots, and smooth to the touch of the shell, this may be an old or damaged egg.
You can find desiccated coconut, vanilla essence and other ingredients in bakeries and supplies stores, or reputable e-commerce platforms!
How to make coconut tart
Step 1Mix the crust dough
 Mix the crust dough
First, you put 25g of sugar and 75g of unsalted butter in a bowl and then use a spatula to beat in one direction to mix well.
Then, you add 1 egg yolk and ½ teaspoon vanilla in a bowl, mix well.
Next, you put 130g of flour in a bowl and mix again.
Finally, you use cling film to cover the dough mixture and then put it in the refrigerator to chill the dough for 30 minutes.
Pro tip: For a more even, smooth mixture, you should sift the flour before adding it to the bowl. You should weigh the right amount of flour to mix because if you put too much flour, the crust will be very hard, not soft. Refrigerating the flour will prevent the dough from drying out and the butter will be re-cooled, so that the dough will expand evenly, creating a delicious crispy crust.
Step 2Shape the crust
 Shape the crust
After 30 minutes, take the cake mixture out of the refrigerator and divide it into small balls.
Next, you line the cake mold with parchment paper and then take small balls of dough into the mold . You press your hand gently so that the crust is evenly spread in the mold and has a thickness of about 0.3cm. The leftover powder you take out.
After shaping the cake, you store it in the refrigerator to make the filling.
Good tip: You should make the cake about 0.3cm thick because if it is thicker or thinner, the crust will be dry and hard after baking. After shaping the cake, you should use a fork to tattoo evenly on the cake shell so that when baking, the cake can escape air and not blister.
Step 3Making the cake
 Make the cake and put the filling in the mold
You put in a bowl 100g of desiccated coconut, ½ teaspoon of baking powder, 8g of flour and use a whisk to beat it all up.
Next , prepare a new bowl, add 65g of sugar, 60ml of unsweetened fresh milk, 1 egg, 1 teaspoon of vanilla and 30g of melted butter. You can also use a whisk to beat the mixture.
Then, you put the 2 mixtures into the same bowl and mix well for all the ingredients .
Next, you take the entire cake out of the refrigerator, scoop out just enough filling to put in the cake mold.
Hot Tip: Melt butter, you should let it cool down before putting it in a bowl because if the butter is too hot when mixing, it will make the eggs cooked and the cake will be mushy. If you store milk and eggs in the refrigerator before, before making cakes, wait for the milk and eggs to cool to room temperature!
Step 4Bake
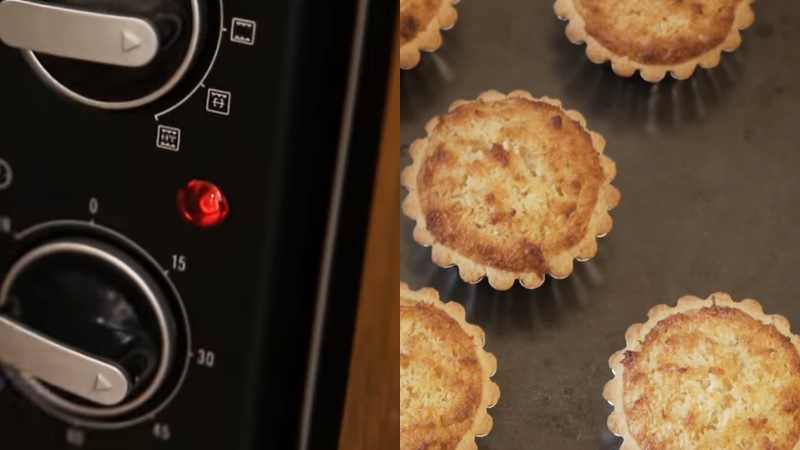
You turn on the oven at 180 degrees C to preheat the oven for 15 minutes. Then, you put the prepared cake tray in the oven, bake at 180 degrees C for 15-20 minutes.
After baking, the cake will have a beautiful golden brown color. You wait for the cake to cool for 10 minutes, then you can take the cake out of the mold and start enjoying!
Good tip: If the cake is not golden when you take it out of the oven, bake it for another 10 minutes at 150 degrees Celsius!
Finished product
 Delicious, greasy coconut tart
So, our delicious and attractive coconut tart is finished. The cake is baked hot and crispy, the crust is delicious and the coconut filling is sweet and fragrant. Surely this unique cake will make the whole family fall in love.
Above is a simple way to make delicious crispy coconut tart at home. You can make this unique cake on your free days for the whole family to enjoy! Good luck.
Thptlaihoa.edu.vn
In conclusion, making delicious and simple crispy coconut tarts at home is not as complicated as it may seem. By following a few basic steps, one can easily achieve a mouthwatering and satisfying treat. Starting with a homemade buttery crust and a sweet coconut filling, the tarts can be baked to perfection, resulting in a crispy and flavorful dessert. To elevate the taste, various toppings such as toasted coconut flakes or a drizzle of caramel can be added. With this recipe, anyone can become a pastry chef and enjoy the delightful combination of crispy tart shells and tropical coconut flavors. So, why wait? Whip up a batch of these delectable treats and impress your friends and family with your homemade crispy coconut tarts.
Thank you for reading this post How to make delicious and simple crispy coconut tart at home at Thptlaihoa.edu.vn You can comment, see more related articles below and hope to help you with interesting information.
Related Search:
1. “Easy recipe for crispy coconut tart”
2. “Delicious coconut tart recipe with crispy crust”
3. “Step-by-step guide to making crispy coconut tart”
4. “Quick and simple coconut tart recipe for beginners”
5. “Crunchy coconut tart recipe from scratch”
6. “Homemade crispy coconut tart with a flaky crust”
7. “Delightful coconut tart recipe with a crispy texture”
8. “Tempting coconut tart recipe with a crispy coconut topping”
9. “Yummy coconut tart recipe with a crispy coconut filling”
10. “Crispy coconut tart recipe with a coconut-infused crust”

